I’m currently in the process of setting up several cloud servers for a new project. The whole infrastructure will run on Hetzner Cloud and be codified.
Since it’s the first time I’m using the Terraform provider for Hetzner Cloud, I want to write down some of the notes I took.
I’ll focus on creating a small, simplified, self-contained example to create a server, set up a firewall, and get a public IP assigned (no private network). If you want to manage multiple stacks and/or multiple projects, it generally makes sense to create your own modules and shared configurations. This is, however, out of scope for this post and not really any different when using Hetzner Cloud vs. other providers.
If you like to read a general overview of Terraform/Infrastructure as Code first, I’ve written a tutorial in 2020 which should still be mostly up-to-date.
Prerequisites
To tell Terraform we are going to work with the Hetzner cloud, we need to specify the relevant provider including a version number, and a token to use for interacting with the API:
terraform {
  required_providers {
    hcloud = {
      source  = "hetznercloud/hcloud"
      version = "~> 1.45"
    }
  }
}

provider "hcloud" {
  token = var.hcloud_token
}
If you’ve used Terraform before this looks just like other provider configurations. We say we want to use the hcloud provider found at hetznercloud/hcloud in the Terraform registry. We set the version compatibility to ~> 1.45, i.e. allowing any higher version less than 2.0.
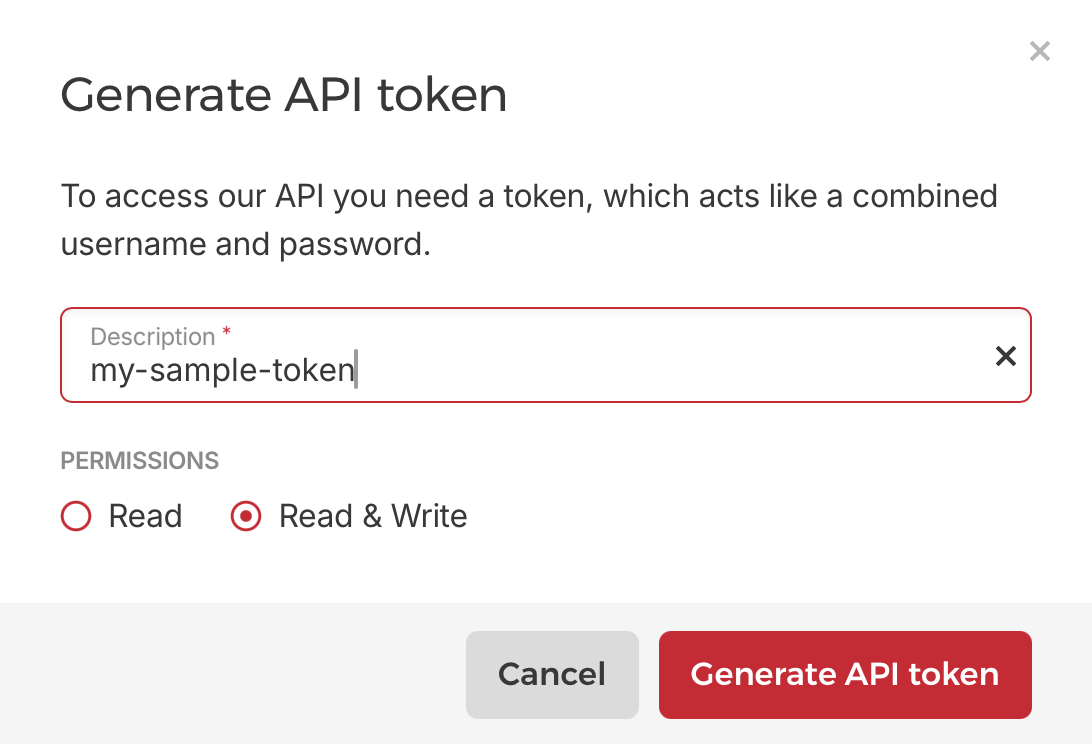
The token can be acquired through the Hetzner Cloud console (Your project -> Security -> API Tokens) and then passed in via a variable:
While not a requirement, a very helpful tool when setting up your Hetzner infrastructure is the hcloud CLI application. I use it mostly to look up things – for example to find the right image identifier to use for a new server:
$ hcloud image list | grep ubuntu
67794396    system   ubuntu-22.04         Ubuntu 22.04         x86            -            5 GB        2022-04-21 15:32:38 CEST   -
103908130   system   ubuntu-22.04         Ubuntu 22.04         arm            -            5 GB        2023-03-20 11:10:04 CET    -
161547269   system   ubuntu-24.04         Ubuntu 24.04         x86            -            5 GB        2024-04-25 15:26:27 CEST   -
161547270   system   ubuntu-24.04         Ubuntu 24.04         arm            -            5 GB        2024-04-25 15:26:51 CEST   -
Or to find the right server type:
$ hcloud server-type list
ID    NAME    CORES   CPU TYPE    ARCHITECTURE   MEMORY     DISK     STORAGE TYPE
22    cpx11   2       shared      x86            2.0 GB     40 GB    local
23    cpx21   3       shared      x86            4.0 GB     80 GB    local
24    cpx31   4       shared      x86            8.0 GB     160 GB   local
25    cpx41   8       shared      x86            16.0 GB    240 GB   local
26    cpx51   16      shared      x86            32.0 GB    360 GB   local
45    cax11   2       shared      arm            4.0 GB     40 GB    local
93    cax21   4       shared      arm            8.0 GB     80 GB    local
94    cax31   8       shared      arm            16.0 GB    160 GB   local
95    cax41   16      shared      arm            32.0 GB    320 GB   local
96    ccx13   2       dedicated   x86            8.0 GB     80 GB    local
97    ccx23   4       dedicated   x86            16.0 GB    160 GB   local
98    ccx33   8       dedicated   x86            32.0 GB    240 GB   local
99    ccx43   16      dedicated   x86            64.0 GB    360 GB   local
100   ccx53   32      dedicated   x86            128.0 GB   600 GB   local
101   ccx63   48      dedicated   x86            192.0 GB   960 GB   local
...
Initializing
Let’s create a new directory, save the provider config from above in a file called main.tf and then initialize it:
$ terraform init
Initializing the backend...
Initializing provider plugins...
- Finding hetznercloud/hcloud versions matching "~> 1.45"...
- Installing hetznercloud/hcloud v1.59.0...
- Installed hetznercloud/hcloud v1.59.0 (signed by a HashiCorp partner, key ID 5219EACB3A77198B)
Partner and community providers are signed by their developers.
If you'd like to know more about provider signing, you can read about it here:
https://developer.hashicorp.com/terraform/cli/plugins/signing
Terraform has created a lock file .terraform.lock.hcl to record the provider
selections it made above. Include this file in your version control repository
so that Terraform can guarantee to make the same selections by default when
you run "terraform init" in the future.

Terraform has been successfully initialized!

You may now begin working with Terraform. Try running "terraform plan" to see
any changes that are required for your infrastructure. All Terraform commands
should now work.

If you ever set or change modules or backend configuration for Terraform,
rerun this command to reinitialize your working directory. If you forget, other
commands will detect it and remind you to do so if necessary.
As you see, the version 1.45 we specified is already superseded, and we downloaded version 1.59.0 instead.
If you want to follow along, your directory should now look like this (or similar, depending on your architecture):
.
├── .terraform
│   └── providers
│       └── registry.terraform.io
│           └── hetznercloud
│               └── hcloud
│                   └── 1.59.0
│                       └── darwin_arm64
│                           ├── CHANGELOG.md
│                           ├── LICENSE
│                           ├── README.md
│                           └── terraform-provider-hcloud_v1.59.0
├── .terraform.lock.hcl
└── main.tf
If you prefer to build the provider yourself, please see these instructions on GitHub.
Setting up variables and outputs
To make it easier to experiment, let’s create a variables.tf and define a few variables for attributes we might want to change along the way:
variable "hcloud_token" {
  sensitive = true
  type      = string
}

variable "project_name" {
  type        = string
  description = "Identifier for naming resources"
}

variable "server_type" {
  type    = string
  default = "cpx22" # check "hcloud server-type list" for a list of options
}

variable "server_image" {
  type    = string
  default = "ubuntu-24.04" # check "hcloud image list" for a list of options
}

variable "location" {
  type    = string
  default = "fsn1" # the data center at which you want to create the resources.
                   # check "hcloud location list" for a list of options
}

variable "admin_ips" {
  type        = list(string)
  description = "CIDR IP ranges for administrative access"
}

variable "ssh_keys" {
  type        = list(string)
  description = "SSH key names or IDs"
}
Most of the variables should be self-explanatory, but I’ve also added a few comments and descriptions to explain the meaning.
To later find out the ID and IP of the server we provision, let’s also create an outputs.tf file with the following content:
output "server_id" {
  value = hcloud_server.example_server.id
}

output "server_ipv4" {
  value = hcloud_server.example_server.ipv4_address
}
I’ll explain where the hcloud_server.example_server comes from in the next step.
Setting up server, firewall and IP address
Now we can finally start creating our resources. Again, the plan is to simply create a server, a few firewall rules and an IP address and then attach the resources accordingly.
IP address
Let’s start with the IP address by creating a new file network.tf:
resource "hcloud_primary_ip" "example_ipv4" {
  name          = "${var.project_name}-ipv4"
  type          = "ipv4"
  location      = var.location
  assignee_type = "server"
  auto_delete   = false
}
To assign an IP address to servers on Hetzner Cloud you will need to create a hcloud_primary_ip resource.
In the above example, we give it a name, a type (one of ipv4 or ipv6), a data center location and a type saying what kind of resource we want to assign this IP to (server).
We set auto_delete to false such that the IP is not being deleted when the server is deleted (if you run terraform destroy later this will still delete the IP as expected).
You could also set assignee_id, but since we want to be able to create the IP before the server is created, I’ll just set the assignee_type.
The name (just a resource identifier) and location (data center) make use of the variables we specified before.
Firewall
On to the firewall configuration.
Since this example doesn’t really have a use-case for the server in mind, we just set a few common inbound rules.
Let’s create firewall.tf and start setting up an hcloud_firewall resource:
resource "hcloud_firewall" "example_fw" {
  name = "${var.project_name}-firewall"

  # ssh
  rule {
    direction = "in"
    protocol  = "tcp"
    port      = "22"
    source_ips = var.admin_ips
  }

  # icmp
  rule {
    direction = "in"
    protocol  = "icmp"
    source_ips = var.admin_ips
  }

  # http
  rule {
    direction = "in"
    protocol  = "tcp"
    port      = "80"
    source_ips = ["0.0.0.0/0"]
  }

  # https
  rule {
    direction = "in"
    protocol  = "tcp"
    port      = "443"
    source_ips = ["0.0.0.0/0"]
  }
}
We give the firewall a name and use the rule argument to create rules.
Each rule must have a direction, protocol, source_ips, and a port (if it applies, i.e. for tcp and udp).
For SSH and ICMP I limit the source IPs to the ranges we can configure via the admin_ips variable. The HTTP ports I leave open for all.
Server
Now we can finally create our server resource:
resource "hcloud_server" "example_server" {
  name        = "${var.project_name}-server"
  server_type = var.server_type
  image       = var.server_image
  location    = var.location

  ssh_keys = var.ssh_keys

  firewall_ids = [
    hcloud_firewall.example_fw.id
  ]

  public_net {
    ipv4_enabled = true
    ipv4         = hcloud_primary_ip.example_ipv4.id
    ipv6_enabled = false
  }

  user_data = templatefile("${path.module}/cloud-init.yml", {
    hostname = "${var.project_name}-example"
  })

  labels = {
    project = var.project_name
    role     = "example-server"
  }
}
Most of the arguments should be clear, but let’s quickly go through them:
name- Obviousserver_type,image,location- These define the type of server, OS and data center, and are filled with the variable values set earlierssh_keys- Here, you can set names of SSH keys that you have set up in the Hetzner Cloud Console. They will be written into theauthorized_keysfile of the root user during initialization. Since we also do some cloud-init setup in the next step, this wouldn’t be strictly necessary, but it’s nice to have a backup access method in case the cloud-init fails. We are setting this argument from a variable defined earlier.firewall_ids– Here, we attach the firewall resource created earlier. Since it’s a list, you can also combine firewalls (I do that for example, when I have a shared module with a few default rules and then a customer or project module with further more specific rules).public_net– In this block, we can attach the IP address we created earlier. If you don’t set this, Hetzner will automatically create a new primary IPv4 (and IPv6, if enabled) for you.user_data– This is where we can set cloud-init data for initialization of the VM. We load the initialization steps from a filecloud-init.yml. More on this later.labels– Just a bunch of labels you can attach to the server
cloud-init
To initialize the server with a few commands, we can use cloud-init (just like on other platforms).
I usually do a bare minimum in the cloud config and then do the actual set up later on with ansible.
Here’s a sample config for completeness. However, it’s not specifically related to Hetzner Cloud:
#cloud-config

hostname: ${hostname}

package_update: true
package_upgrade: true

packages:
  - ufw
  - python3

users:
  - name: ansible
    groups: users, admin
    lock_passwd: true
    sudo: ALL=(ALL) NOPASSWD:ALL
    shell: /bin/bash
    ssh_authorized_keys:
      - ssh-ed25519 AAAA...

write_files:
  - path: /etc/ssh/sshd_config.d/ssh.conf
    content: |
      PermitRootLogin no
      PasswordAuthentication no
      Port 22
      MaxAuthTries 2
      AuthorizedKeysFile .ssh/authorized_keys
      AllowUsers ansible

runcmd:
  - ufw allow 22/tcp comment 'SSH'
  - ufw allow 80/tcp comment 'HTTP'
  - ufw allow 443/tcp comment 'HTTPS'
  - ufw --force enable
  - systemctl restart sshd
Creating and destroying the infrastructure
If you followed along, you should now have a directory with the following files:
.
├── cloud-init.yml
├── firewall.tf
├── main.tf
├── network.tf
├── outputs.tf
├── server.tf
└── variables.tf
We can now plan, apply and destroy the infrastructure as usual. Make sure to set the values for the variables (via the prompt, environment variables and/or a .tfvars file).
$ terraform apply
...
Apply complete! Resources: 3 added, 0 changed, 0 destroyed.

Outputs:

server_id = "11223344"
server_ipv4 = "1.2.3.4"
Further information
For further information check out the full documentation of the Hetzner Cloud provider on the Terraform Registry site.
✉️ Have a comment? Please send me an email.